Plumbing upgrades can be confusing, especially when you encounter terms like “wet vent.” This guide simplifies wet vent plumbing, showing you how to install one, save money, and avoid costly mistakes. We’ll explain what wet vents are and how they compare to dry vents. Then, we’ll walk you through a step-by-step installation process, covering important plumbing codes and common errors to watch out for. You’ll learn how to build a system that will last and find tips and tricks from other homeowners to maximize efficiency and minimize costs. For more help on related plumbing issues, check out this guide on common water heater problems.
Wet Vent Installation: Save Money & Time – An Overview
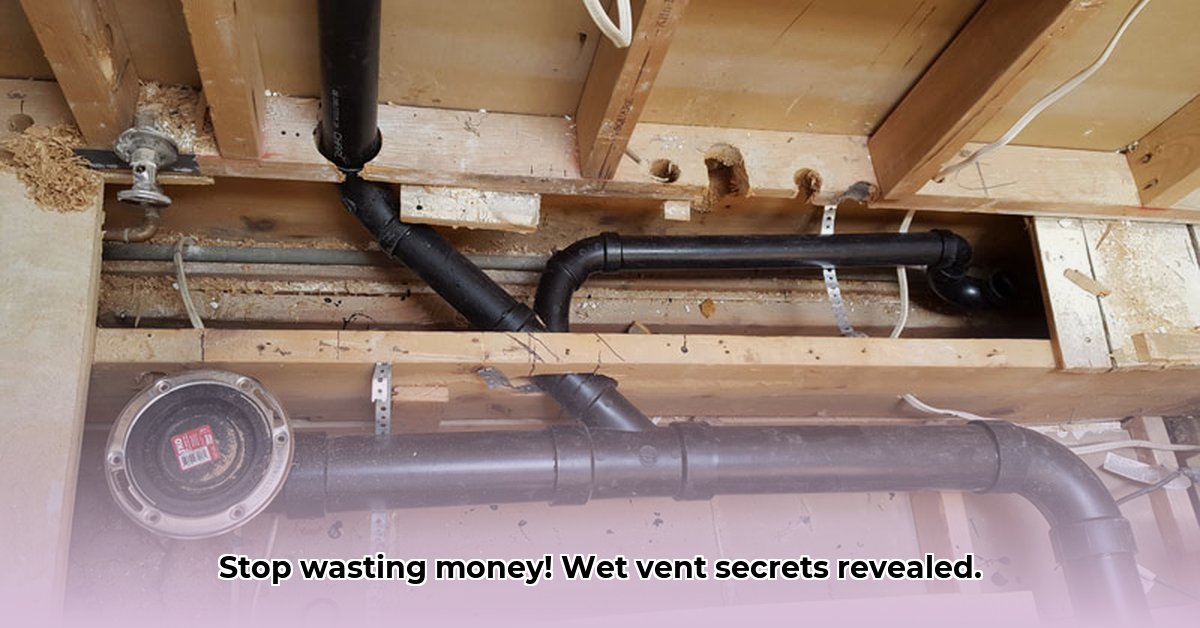
Let’s talk about wet vents – a plumbing system that combines drainage and venting into one pipe. Think of it as a clever shortcut that can save you money on materials and labor compared to traditional setups, enhancing overall plumbing efficiency. But, like any shortcut, doing it right is key. A poorly installed wet vent can lead to more problems than it solves. This guide walks you through the process so you can reap the rewards of a well-functioning, cost-effective system.
Understanding Wet Vents: The Basics of Plumbing Systems Integration
A wet vent system uses a single pipe for both draining wastewater and venting sewer gases. It’s efficient when used correctly. The wastewater flowing through the drain pipe itself creates a vent, preventing sewer gases from backing up, improving drain efficiency. However, this efficiency comes with a crucial caveat: the design and installation require more precision than a traditional dry vent system. Mistakes can lead to clogs, unpleasant smells, and potential code violations, highlighting the importance of plumbing code compliance and understanding drainage solutions.
Why Choose a Wet Vent System? Dollars and Sense
Saving money is appealing. Wet vent systems typically use fewer materials and less labor than dry vent systems, making them a potentially less expensive option and a great way to achieve cost effective plumbing. This translates to lower upfront costs and potentially less time spent on installation. However, more planning and precision are crucial, demanding a good understanding of plumbing design. You essentially trade the simplicity of a traditional system for potential cost savings, making proper planning a non-negotiable. A well-planned wet vent system can reduce material costs by up to 30% compared to traditional venting. Remember, cost savings depend on doing the job right.
Planning Your Wet Vent System: Laying the Groundwork for Success
Careful planning is vital; poor planning can create a plumbing nightmare. Here’s what you need to consider for efficient plumbing layout:
-
Pipe Sizing: Using pipes that are too small will lead to slow drainage and potential clogs. Pipes that are too large waste materials and money. Local plumbing codes often specify minimum pipe diameters (two inches is a common minimum for wet vents, but larger mains might be required depending on your system’s complexity). Always check your local codes. The correct size depends on the number and type of fixtures connected to the system. Consult a plumbing professional or a reliable sizing chart if unsure.
-
Fixture Placement: The location of your sinks, toilets, and other fixtures significantly impacts the wet vent design, influencing fixture unit calculation. Some arrangements are better suited than others, and some layouts simply won’t work. The proximity of the fixtures to the main drainage line will influence the design and length of the wet vent pipe. Consider the flow rate of each fixture when planning your layout.
-
Connection Angles: The angles at which pipes connect are critical. Sharp bends restrict water flow, increasing the likelihood of blockages. Gentle slopes and angles (generally less than 45 degrees for wet vents) are recommended to ensure smooth drainage and optimal water flow. Using the correct fittings is also very important. Use wye fittings instead of tee fittings where possible to improve flow.
-
Local Plumbing Codes: Always consult your local plumbing codes to ensure code compliant plumbing. These codes vary widely depending on region, and ignoring them can lead to costly fines and rework. A little research upfront saves you significant headaches later. Many jurisdictions provide online access to their plumbing codes.
Step-by-Step Wet Vent Installation: A Practical Guide to Pipe Fittings
This section provides a general guideline. Remember to adapt it to your specific situation and always adhere to local plumbing codes. If you’re unsure about any step, consult a professional plumber. You will need to select the right pipe fittings for your plumbing needs.
Step 1: Detailed Planning and Design
- Create a detailed system layout, accurately representing fixture locations, pipe sizes, and connection points. Use a plumbing design software or a detailed hand-drawn sketch.
- Cross-reference your design with your local plumbing codes to ensure compliance. Efficacy Metric: Compliance rates improve when using a detailed layout.
- Obtain any necessary permits from your local building authority.
Step 2: Gather Your Materials
- Acquire all necessary pipes, fittings, traps, and other components. Ensure all materials meet local code requirements and are of a high quality for effective plumbing maintenance.
- Double-check your measurements and quantities before beginning the installation.
Step 3: Careful and Precise Installation
- Carefully assemble the wet vent system, following your design and paying meticulous attention to angles and connections.
- Securely connect the wet vent to the building’s drainage and plumbing lines. Use appropriate sealants and clamps to prevent leaks. Apply Teflon tape to threaded connections.
- Inspect each connection for leaks and tightness.
Step 4: Thorough Testing and Inspection
- Run water through each fixture connected to the wet vent system, observing the drainage flow.
- Carefully inspect all connections for any signs of leaks.
- If necessary, use a pressure test to identify leaks within the system. Your local plumbing codes might require a specific pressure test.
Troubleshooting: Addressing Potential Problems with Venting Systems
Despite careful planning, issues can arise. Here are some common problems, possible causes, and remedies within water venting systems:
- Clogs: Often caused by improper pipe sizing or sharp bends. Clear clogs using appropriate tools (a plumber’s snake is often helpful). If recurring, re-examine pipe sizing and angles for better drain cleaning. Consider using enzymatic drain cleaners for maintenance.
- Foul Odors: Indicates a leak or improper sealing somewhere in the system, allowing sewer gases to escape. Check all joints, seals, and connections for leaks or cracks. Re-apply sealant or replace damaged fittings.
- Slow Drainage: Could be due to clogs, improper pipe sizing, insufficient slope, or low water pressure. Check for blockages. If pipes are correctly sized and sloped, consider investigating water pressure. Install a pressure booster if needed and permitted.
Wet Vent Systems: Weighing the Pros and Cons for Cost Savings
| Feature | Pros | Cons |
|---|---|---|
| Cost | Lower material and labor costs. | Requires precise installation; a poorly executed installation can be costly. |
| Efficiency | Combines drainage and venting, simplifying the plumbing system. | Can be more complex and challenging to design and install than dry vents. |
| Installation | Uses fewer materials. | Higher risk of failure if incorrectly installed. |
| Maintenance | Typically low maintenance due to fewer components. | Requires careful planning and attention during installation to avoid long-term issues. |
Final Thoughts: Compliance and Professional Help for Plumbing Solutions
Remember: your local plumbing codes are your ultimate guide. Always adhere to them to ensure legal compliance. If you’re uncertain about any aspect of the installation process, don’t hesitate to contact a licensed plumber. The cost of professional installation can be a small price to pay to avoid costly and potentially hazardous mistakes. This approach ensures your wet vent system functions efficiently and safely for years to come, providing optimal plumbing solutions.
How to Determine Wet Vent Plumbing Fixture Unit Limits by Local Code to Prevent Waste
Key Takeaways:
- Understanding local plumbing codes is crucial for wet vent system design.
- Fixture unit (FU) limits vary based on pipe size, material, and orientation (vertical vs. horizontal).
- Proper venting prevents sewer gas buildup and maintains trap seals.
- Incorrect wet vent installation can lead to plumbing issues and code violations.
- Resources like your local building department can provide code-specific guidance.
What are Wet Vents and Why Do They Matter in Plumbing Systems?
Wet vents share drainage and venting functions within a single pipe. It’s a two-in-one system, combining waste removal with air circulation – essential for efficient plumbing systems. This design, while cost-effective, has limitations. The key to a successful wet vent system lies in correctly determining the maximum number of fixtures it can handle—and that’s where your local plumbing code comes in, promoting responsible plumbing.
How to Determine Wet Vent Plumbing Fixture Unit Limits
Fixture Units (FUs) offer a standardized way to measure the load each plumbing fixture places on your drainage system. Each type of fixture (sink, toilet, shower, etc.) is assigned a specific FU value. Your local plumbing code will specify the maximum number of FUs that can be connected to a wet vent of a particular size and material.
- Consult Your Local Plumbing Code: This is the most critical step. Search for the section on drainage fixture unit (DFU) values and wet venting requirements. Look

- Windows App to Stop Apps Running in Background Saves Battery - February 2, 2026
- How To Spot Android Apps Running In The Background - February 1, 2026
- Android App to Stop Background Apps and Save Battery - January 31, 2026